Developer Loop My Blog with GitHub CodeSpaces
Intro to GitHub Codespaces / Setup
GitHub Codespaces was introduced at GitHub Satellite 2020 during the keynote and it showcased a new functionality available to users with push permission in a repository. Said users will be able to create a development instance, known as a “codespace” that will clone your repositoty and load all your configurations you have set in dot files. What codespaces is in summary is a version of Visual Studio Code that runs in the browser (just like the Visual Studio tool of the same name), that you can launch via a button available on your repo’s UI.

You may notice that the button location is where “clone” used to be. When you click that button, you will have options to clone, download a zip, open in Visual Studio, and finally, open in codespaces.
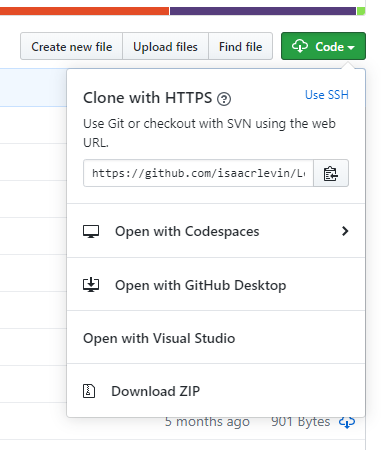
If you choose to “Open with Codespaces”, it gives you a prompt to create a new codespace, or choose an existing one if you do. Codespace creation takes a few minutes, but when you are done, you will be given an environment that looks like a GitHub branded version of VS Code with your repo cloned to it.
At this point, we are ready to go!
Writing Code in the Cloud
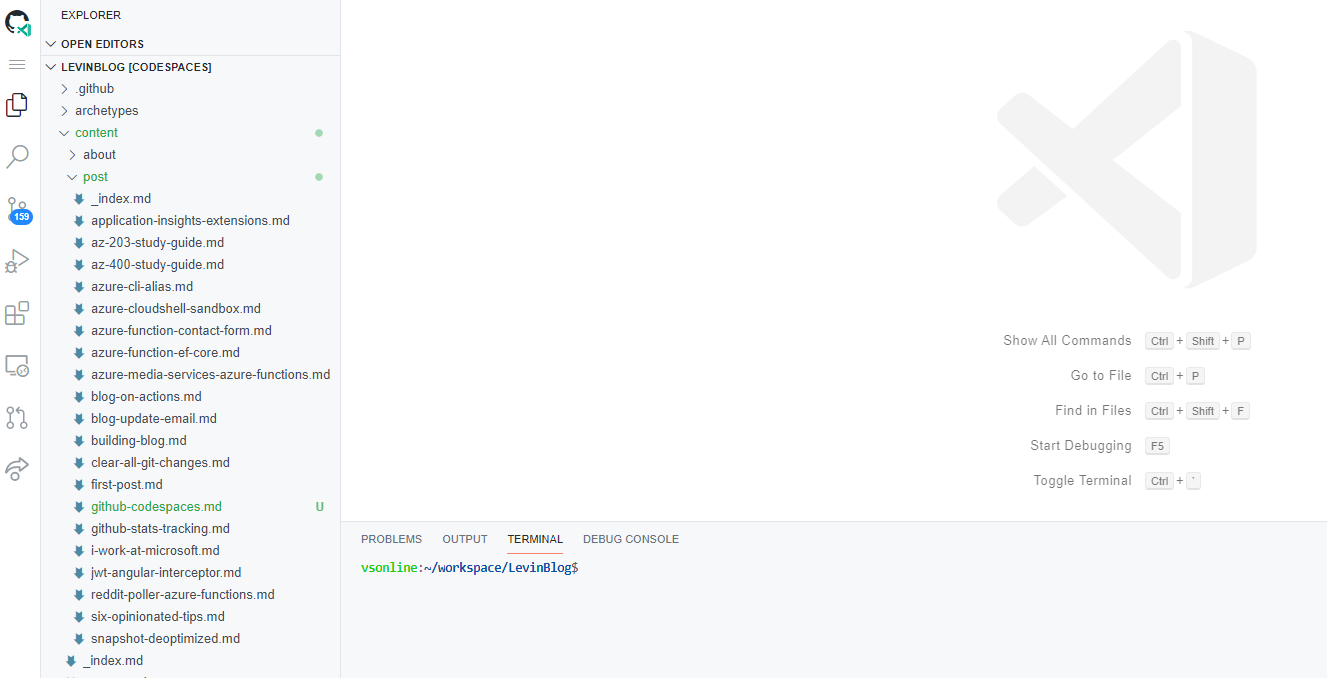
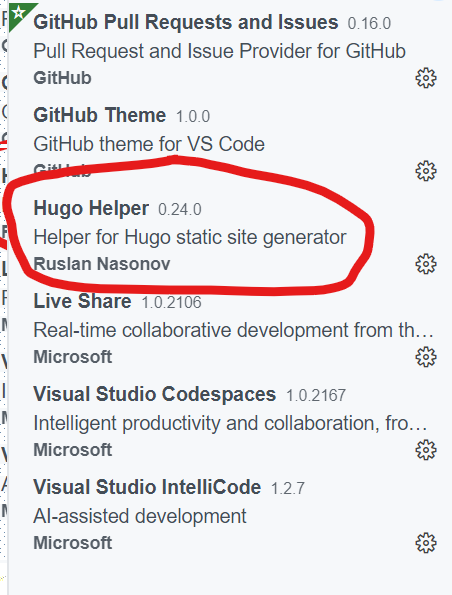
Codespaces gives us the ability to develop against a cloned version of your repo. In this example, I decided to open my blog in codespaces and take a look at the experience. The first thing I see is that I have a ton of preinstalled VS Code Extensions, and I can add ones, since my site is a Hugo Static Generated Site , I can install some Hugo extensions, after which, I can open up Command Palette just like in Code.
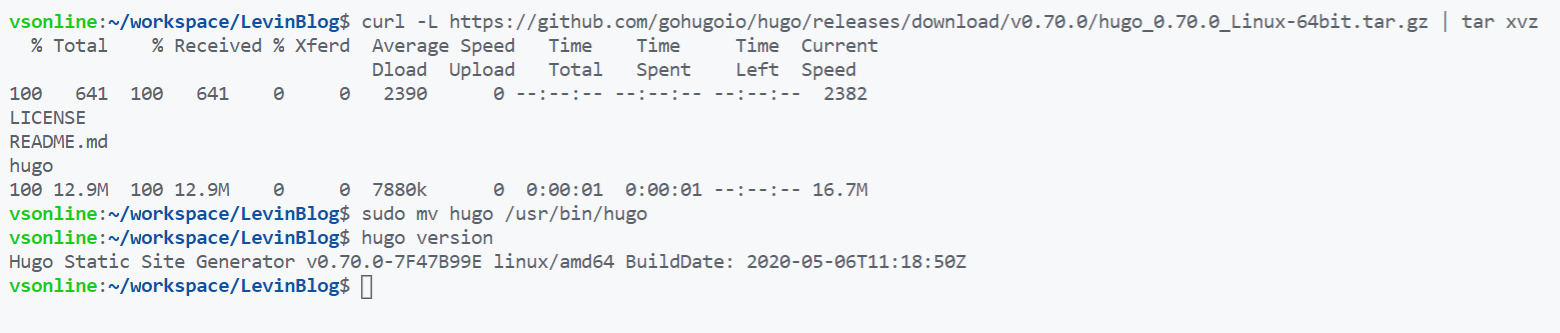
I can than create files, upload from my local machine, and open a terminal. One thing that is required when we build Hugo sites is we need to have Hugo installed if we want to build the sites. Since codespaces under the hood is a VM, that we can leverage via a file exploer and terminal, we can see what OS the VM runs on, and eventually install Hugo on the VM.

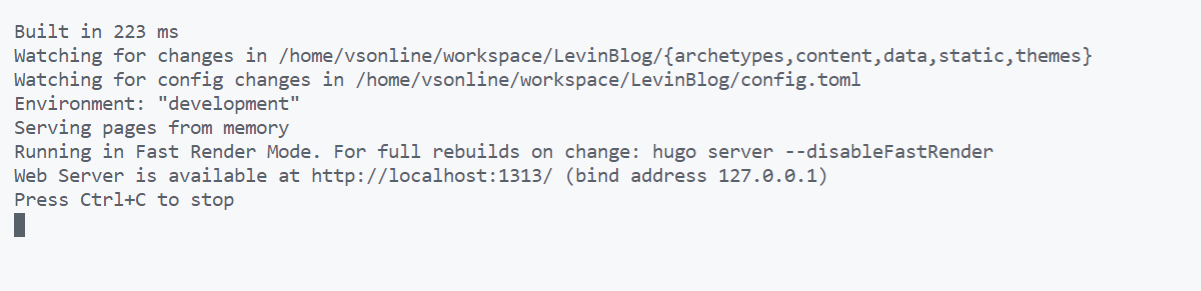
Installing Hugo in this case, since we are in Linux, is pretty easy by downloading the tar file, opening it, and moving the exe to /usr/bin so it will be available in path.
| |
Debugging with Codespaces
Now that I have installed Hugo in my codespace, I can take advantage of it’s live server functionality, which spins up a localhost app that you can view. But Isaac, we aren’t running on our machine, how can we connect to local host. Well, codespaces opens up a proxy that you can open very easily.

Commiting Back to Our Repo
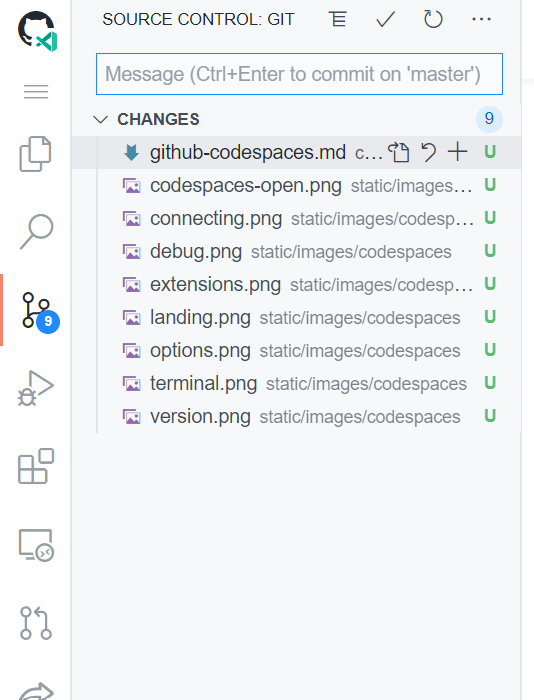
When we feel like we are in a good spot with our changes, we can easily commit our code back to GitHub, the same way we do in VS Code.
And that’s it, super duper easy!
This is Really Great
This entire blog post was written, debugged, and commited all using codespaces. I was able to complete the entire developer loop all the way to production, all with rich amazing GitHub integration. Again, codespaces is in limited beta preview, if you want to take a test drive, sign up here .